Capture evidence on site
Press + to open the camera. Choose Photo, Video, Voice or Note and capture. Tap a photo to write on it and mark what matters. Then file the capture in four short steps:
- Destination: a work record (new or already open), or a project, filed as a survey, RFI or snag.
- Set up: create a new work record or use an existing one, and pick the type of works: Minor Works, Emergency Works (which notifies the site manager) or CPS Works.
- Location: the asset the capture is about (existing or new), the stage (Before, During or After), the floor and a pin on its plan. Site suggests the floor you are on.
- Continue capturing to take the During and After shots of the same asset in one go, or Skip capturing to finish.
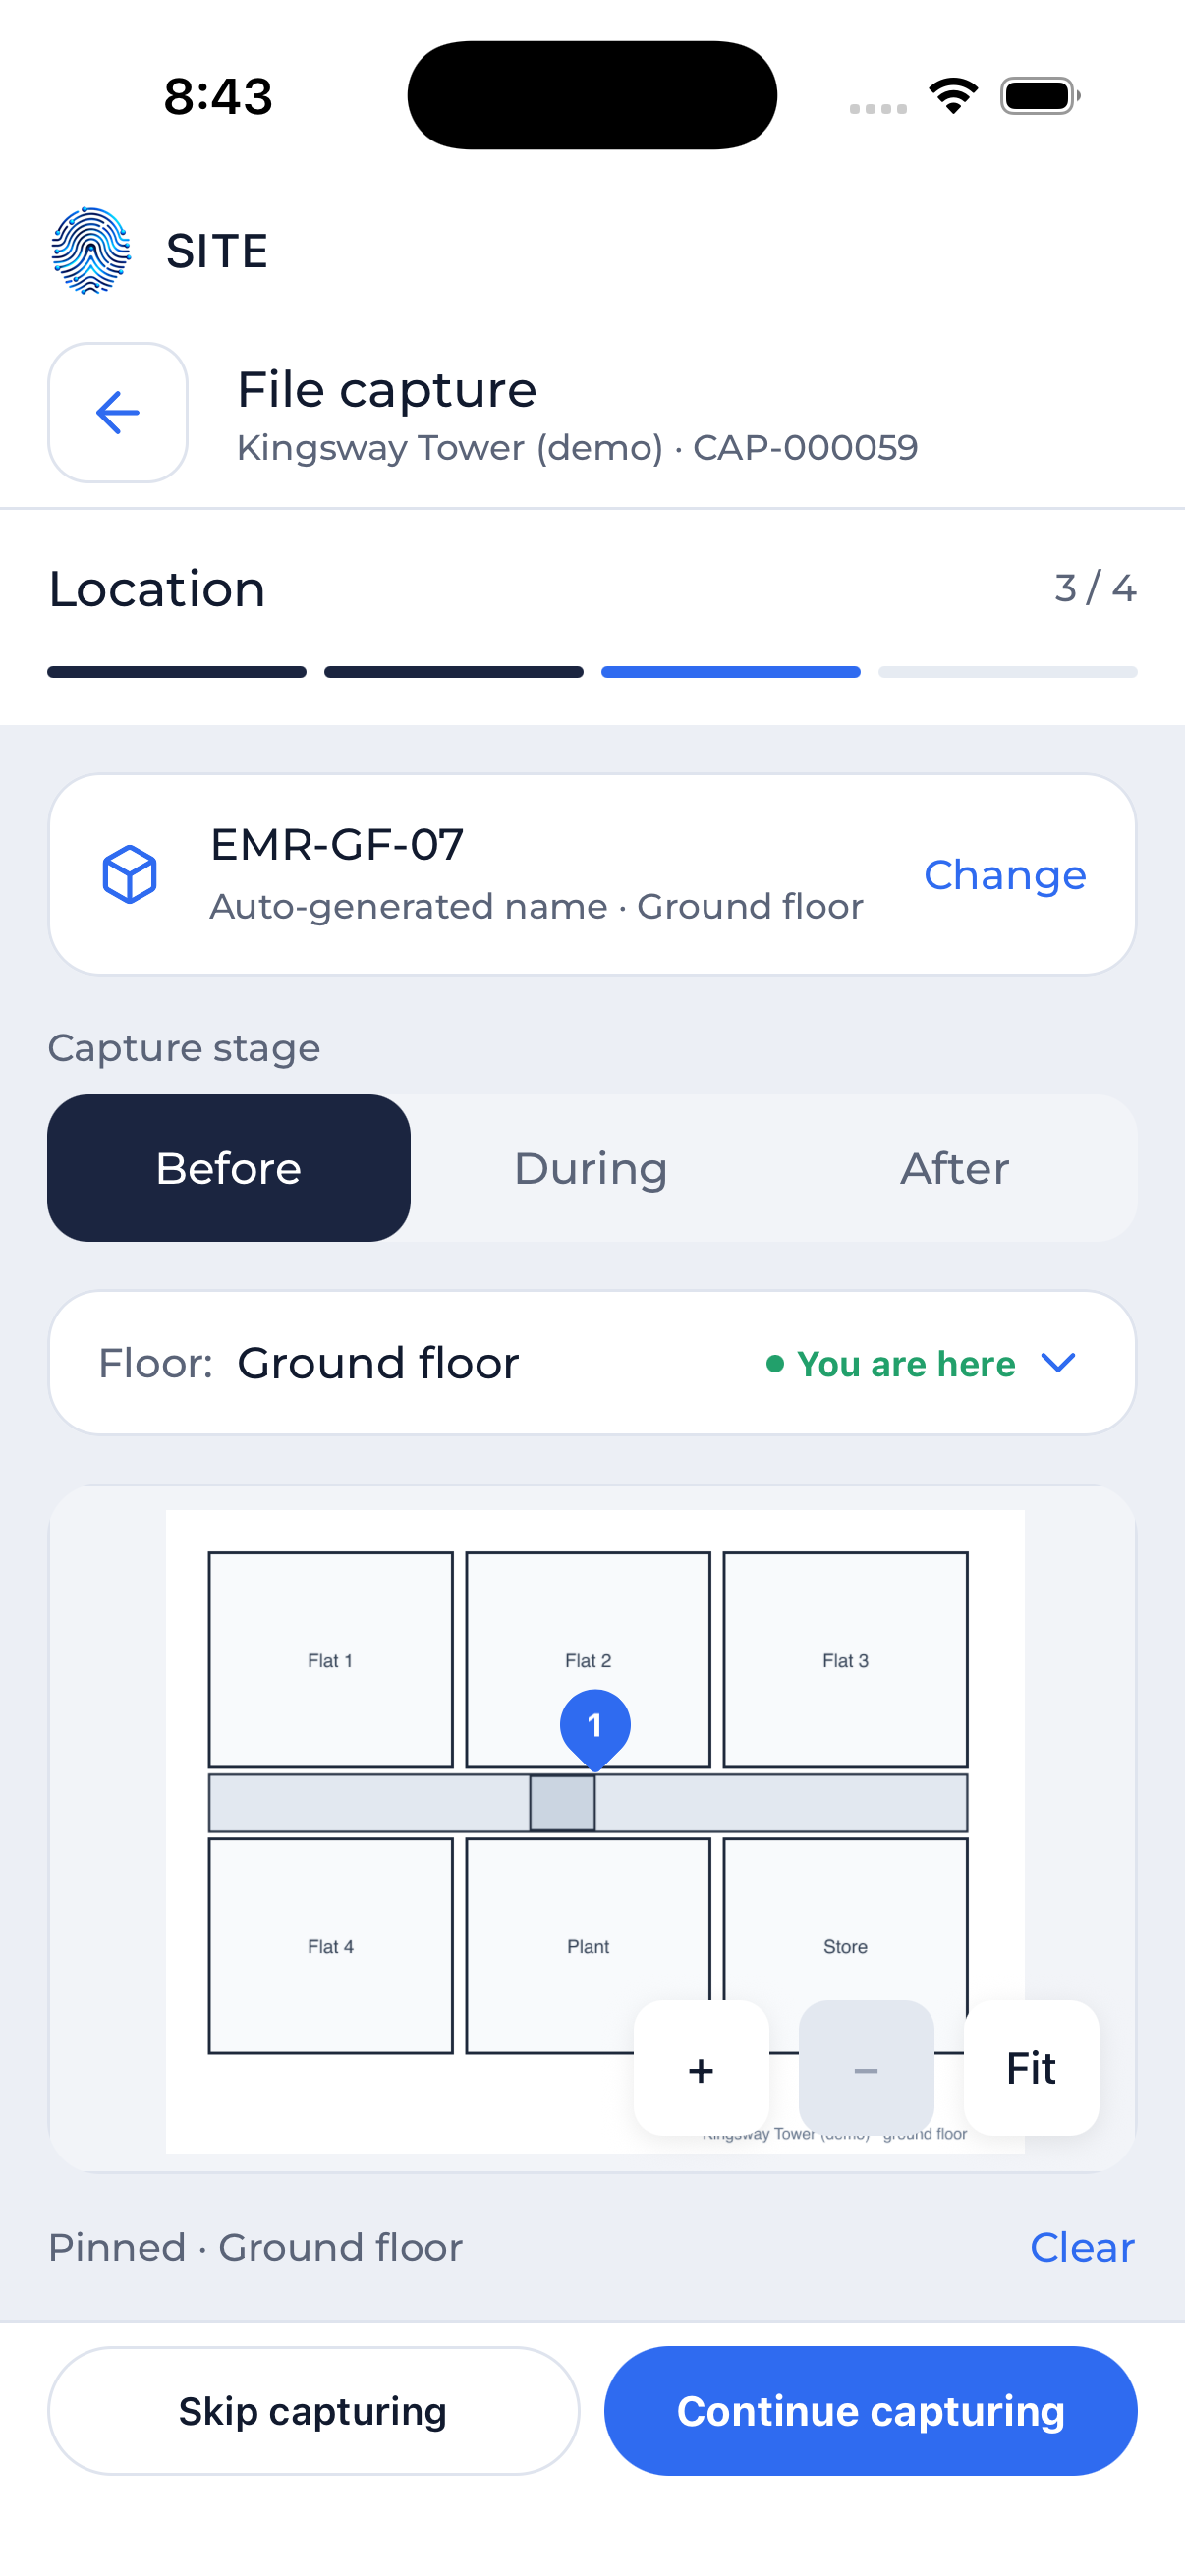 Choosing the location of a capture
When it is filed, Site shows a summary: the work record, type, location, asset and the captures per stage. The evidence is now on the record and visible to the team in Core. From there, Continue to work record or Capture new.
A capture you are not ready to file can be kept as a draft and filed later.